Start 4 min read

Getting started

शुरुआत करें

Sign up, follow the guided setup and make your first bill in a few minutes.

साइन अप करें, गाइडेड सेटअप पूरा करें और कुछ ही मिनटों में पहला बिल बनाएँ।

Updated

Whole guide as PDF

What it does

FoodPilot runs your whole restaurant from one app: billing, kitchen, stock, staff, guests and money.

It works in any modern browser on a phone, tablet or computer, and keeps billing when the internet drops.

Sign up, follow the guided setup, and make your first bill in a few minutes.

Who uses it
OwnerManager
Which plan
Every plan, including Free
New restaurants get 3 months of every module free. No card needed.
Where to find it
www.foodpilot.org → Sign up
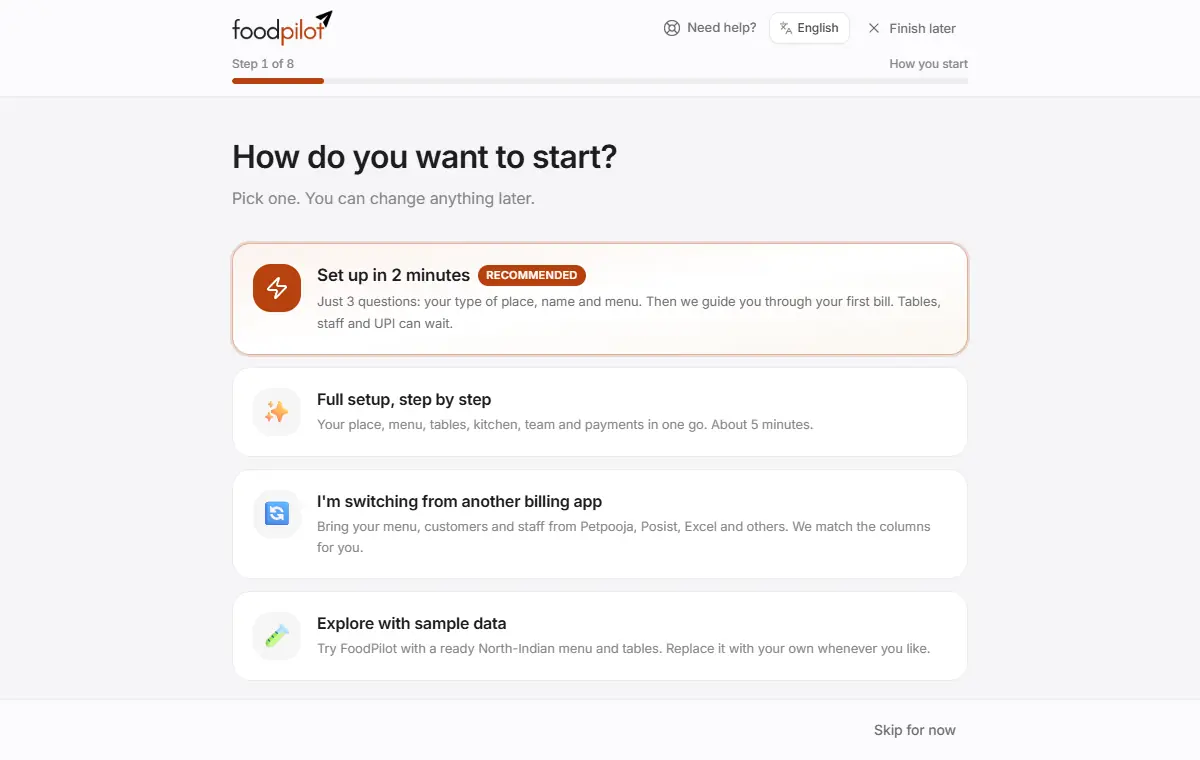
FoodPilot guided setup, first step: how do you want to start?

How to

Create your restaurant

foodpilot.org → Sign up → Create restaurant

  1. Step 1: Open www.foodpilot.org/signup.
  2. Step 2: Tap Continue with Google or Continue with email. With email, type the 6-digit code we send you and tap Continue.
  3. Step 3: Under Name your restaurant, type your restaurant's name and tap Create restaurant.
  4. Step 4: No email? Tap Use mobile number instead. Fill in your restaurant name, your name, mobile number and a password (8 characters or more). Under Get started with, choose My own menu (recommended), Sample menu to explore or Sample menu + 30 days of sales. Tap Create restaurant.
  5. Step 5: FoodPilot opens the guided setup.
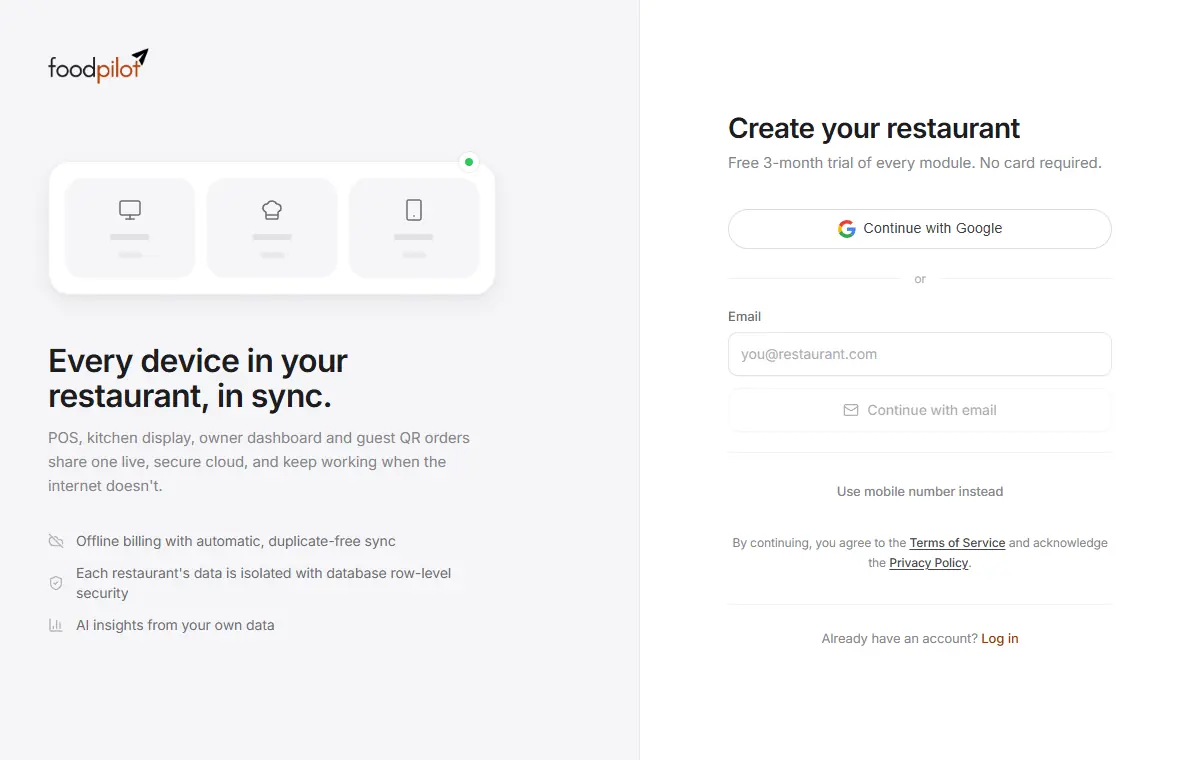
The Create your restaurant page with Continue with Google and Continue with email

Follow the guided setup

Opens by itself after sign-up

  1. Step 1: How do you want to start? Pick Set up in 2 minutes (recommended), Full setup, step by step (about 5 minutes), I'm switching from another billing app, or Explore with sample data.
  2. Step 2: What kind of place do you run? Pick the closest type, such as dhaba, café or fine dining. FoodPilot sets up the right screens, kitchen counters and billing defaults.
  3. Step 3: Your restaurant: type the name as it should appear on bills. GSTIN, FSSAI, phone and address can wait. Tap Save and continue.
  4. Step 4: Your menu: Start from a ready menu (tick what you sell and type your prices), Click photos of your menu card, Upload from Excel / old POS, Say your dishes or Type it.
  5. Step 5: In the full setup you also add your tables (Create tables), kitchen counters (Save stations), your team (or Just me for now) and your UPI ID, so every bill gets a UPI QR.
  6. Step 6: At the end, tap Make my first bill. FoodPilot shows you each tap. Choose to practise first if you like: a practice bill isn't counted as a sale.

Tap Skip for now on any step. You can come back to it later from the dashboard or from Setup.

Check your setup

Setup

  1. Step 1: Open Setup in the sidebar. On a phone, tap More first.
  2. Step 2: Profile & GST: legal name, address, GSTIN and state. The state decides whether bills show CGST + SGST or IGST.
  3. Step 3: Tax rates: check the GST rates your dishes use.
  4. Step 4: Categories: your menu sections, for example Starters, Main course and Beverages.
  5. Step 5: Kitchen stations: where KOTs go, for example Tandoor, Chinese or Bar.
  6. Step 6: Tables & floor: your tables, for dine-in billing and table QR ordering.
  7. Step 7: Edition: pick the preset closest to your business (Dhaba, Café, QSR, Fine dining, Cloud kitchen, Bakery, Bar & pub, Food truck or Enterprise) and tap Apply edition.
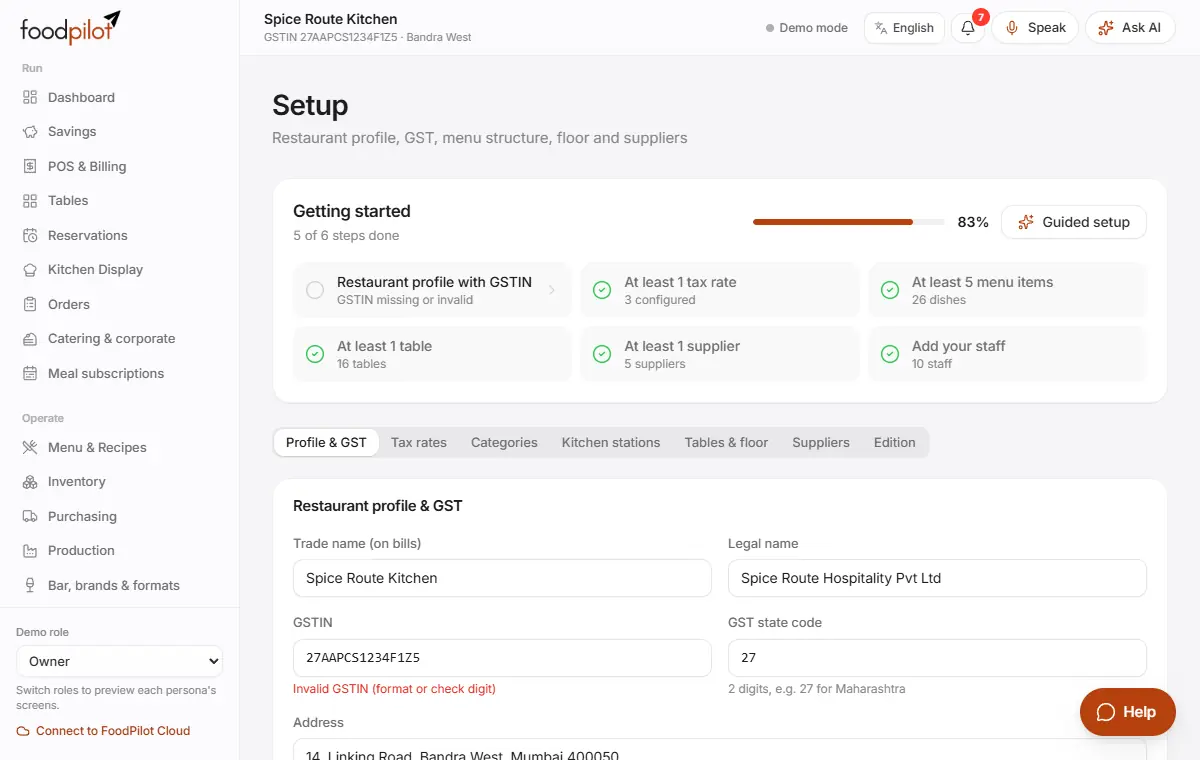
The Setup page with tabs for Profile & GST, Tax rates, Categories, Kitchen stations, Tables & floor, Suppliers and Edition

Make your first bill

POS & Billing → Takeaway → tap a dish → Pay → Cash → Settle

  1. Step 1: Open POS & Billing.
  2. Step 2: Tap Takeaway.
  3. Step 3: Tap a dish to add it.
  4. Step 4: Tap Pay, then Cash.
  5. Step 5: Tap Settle ₹… · Cash. The invoice opens. Tap Print or Done.

Try the demo first

foodpilot.org → Open live demo

  1. Step 1: On the home page, tap Open live demo. You don't need to sign up.
  2. Step 2: The demo has a sample menu, tables and orders. It is saved only in this browser.
  3. Step 3: Change Demo role at the bottom of the sidebar to see what a cashier, waiter or chef sees.

Tips

  • Coming from another POS? Bring your menu, customers and past bills from Data centre → Switch to FoodPilot.
  • Add staff sign-ins in Staff & payroll → Logins.
  • Add your printers in Devices & printers before your first service.
  • Install FoodPilot like an app: in Chrome or Edge choose Install FoodPilot. On iPhone, tap Share → Add to Home Screen.
  • Hidden modules keep their data. Show them again from Setup → Edition → Modules in navigation.

Common problems

I didn't get the email code.
Check your spam folder and wait a minute. Codes come from no-reply@foodpilot.org. You can also sign up with Google or a mobile number.
It says my GSTIN doesn't look right.
A GSTIN has 15 characters and starts with your state code. You can leave it blank and add it later in Setup → Profile & GST.
A module is missing from the sidebar.
Your edition may hide it, or your role may not include it. The owner can show it in Setup → Edition → Modules in navigation. A lock icon means your plan doesn't include it.
It says my session expired.
Log in again. Work saved on this device is kept and syncs after you log in.

Read next

Help articles

The same articles the AI help chat uses. In the app: Help & support → Help articles.

Set up your restaurantअपना रेस्टोरेंट सेट अप करेंRead

Set up your restaurant profile, GST, categories, kitchen stations and tables before your first bill.

Steps

  1. Go to Setup in the sidebar (on phones, tap More first). Owners and managers can open it.
  2. In Profile & GST, enter the restaurant name, legal name, address, GSTIN and state. The state decides whether bills show CGST + SGST or IGST.
  3. In Tax rates, check the GST rates your dishes use.
  4. In Categories, add your menu sections, for example Starters, Main course and Beverages.
  5. In Kitchen stations, add the stations that receive KOTs, for example Tandoor, Chinese or Bar.
  6. In Tables & floor, add your tables for dine-in billing, QR ordering and the floor plan.
  7. In Edition, pick the preset closest to your business: Dhaba, Café, QSR, Fine dining, Cloud kitchen, Bakery, Bar & pub, Food truck or Enterprise chain. It shows or hides modules and sets sensible defaults. Hidden modules keep their data and can be shown again at any time.
  8. Add your dishes in Menu & Recipes (see "Add or edit a dish").

Tips

  • Guided setup on the Setup page walks you through the same steps one by one.
  • Coming from another POS? Import your menu and past bills in Data centre → Switch to FoodPilot.
  • Add staff sign-ins in Staff & payroll → Logins.
  • Add your printers in Devices & printers before the first service.
Open in Help →
Sign-in, email verification and two-step verificationसाइन-इन, ईमेल सत्यापन और टू-स्टेप वेरिफिकेशनRead

How to sign in to FoodPilot, verify your email, turn on two-step verification and sign out other devices.

Ways to sign in

  • Continue with Google or Continue with email (a 6-digit code is sent to your email).
  • Use mobile number instead for a mobile number with password or OTP.
  • Google and email codes work only for an account whose email is verified.

Verify your email

  1. Sign in with your mobile number.
  2. Go to Settings → Security → Sign-in methods.
  3. Tap Verify email and enter the code sent to your inbox.

Two-step verification

  1. Go to Settings → Security → Two-step verification.
  2. Tap Turn on and scan the code with an authenticator app.
  3. From then on, every sign-in asks for the authenticator code.

Sessions and devices

  • Settings → Security → Sessions lists where you are signed in. Use Revoke for one session or Sign out others for all other devices.
  • If the sync status shows Session expired · log in, tap it and sign in again. Changes made on this device stay queued and sync after you sign in.

Good to know

  • Before signing out, wait until queued changes have synced. Signing out with unsynced changes loses them.
  • Never share sign-in codes, passwords or OTPs with anyone, including in this chat.
Open in Help →
Import from another POS and export your dataदूसरे POS से डेटा लाएँ और अपना डेटा एक्सपोर्ट करेंRead

Move your menu, customers, suppliers and past bills into FoodPilot, and download a copy of your data at any time.

Import from another POS

  1. Go to Data centre → Switch to FoodPilot (owners and managers).
  2. Under Where are you coming from?, pick your current software, for example Petpooja, Restroworks / Posist, GoFrugal, Rista, UrbanPiper, LimeTray, DotPe, Torqus, Zomato / Swiggy reports or Tally.
  3. In your old software, export items (menu), customers and sales as Excel or CSV.
  4. Tap Choose files and add all the files at once. FoodPilot detects what each sheet contains.
  5. Next: check columns: match your columns to FoodPilot fields. Save the mapping with Save as template if you will import again.
  6. Next: review, then Import now.

You can import dishes, categories, customers, suppliers, ingredients, tables, staff and past bills with their GST. Sample files has ready templates.

Export your data

  • Data centre → Export: Download one list (for example menu items, customers or sales with GST breakup), Download all CSVs, or Download JSON for everything.
  • Settings → Your data → Download all data gives the owner a full export.
  • Data centre → Browse data lets you look through your records.

Good to know

  • Imports need FoodPilot Cloud sign-in and owner or manager access. Exports need the reports or settings permission.
  • Check the review screen carefully: it shows what will be created before anything is saved.
  • If an import fails, raise a ticket with the source software and the file type. Don't attach customer phone numbers in the chat.
Open in Help →