
Grow 2 min read
Multi-outlet and franchise
कई आउटलेट और फ़्रैंचाइज़
Run many outlets from one login: a master menu, outlet prices, stock transfers, royalties and side-by-side numbers.
एक लॉगिन से कई आउटलेट चलाएँ: मास्टर मेन्यू, आउटलेट के दाम, स्टॉक ट्रांसफ़र, रॉयल्टी और तुलना।
What it does
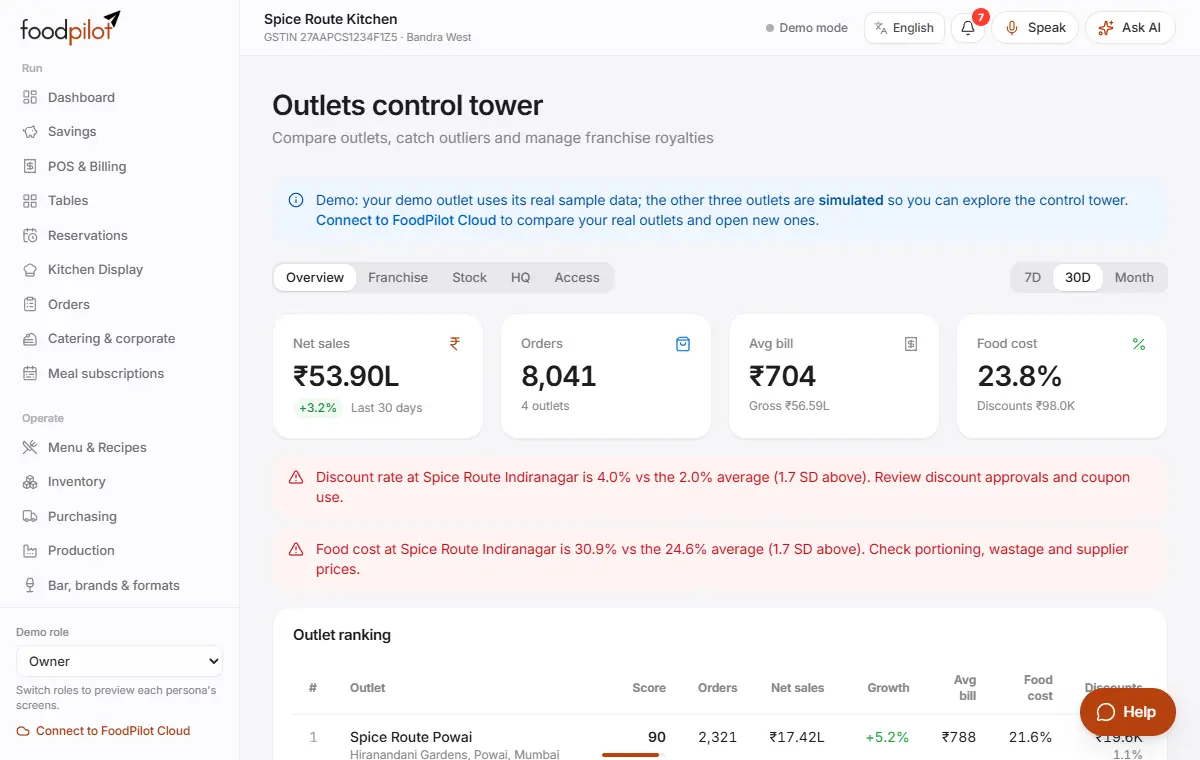
See every outlet's sales and ranking in one place, and switch outlets in a tap.
Keep one master menu and push it to outlets, with local prices and dishes where you need them.
Send stock between outlets and keep track of franchise royalties.
- Who uses it
- OwnerManagerAccountant
- Which plan
- Business (up to 5 outlets) · Enterprise for more
- Professional includes the Outlets screen for one outlet.
- Where to find it
- Sidebar → Outlets (page title: Outlets control tower)
How to
Add an outlet
Outlets → Add outlet → Create outlet
- Step 1: Open Outlets and tap Add outlet.
- Step 2: Enter the outlet name and address. Leave GSTIN blank to use the first outlet's.
- Step 3: Under Copy configuration from, pick the outlet to copy the menu and setup from.
- Step 4: Tap Create outlet, then Switch to it or Stay here.
Switch outlets
- Step 1: Tap the outlet name at the top of the app (Switch outlet) and pick one.
- Step 2: Wait for changes to sync first. Unsynced changes are lost if you switch.
Push the master menu
Outlets → HQ → Push master data → Preview → Confirm push
- Step 1: Open HQ and go to Push master data.
- Step 2: Tick what to send (menu items, categories, tax rates, kitchen stations, price rules, suppliers, ingredients) and the outlets.
- Step 3: Choose Everything or Prices only, then tap Preview and Confirm push.
- Step 4: Changed your mind? Roll it back from Push history.
Local dishes and prices
- Step 1: In HQ → Master menu, set each dish to Follow HQ, Available here or Not sold here for each outlet.
- Step 2: Use Schedule a price change to change prices from a future date.
Send stock to an outlet
Outlets → HQ → Transfer stock to an outlet
- Step 1: Pick the ingredient, quantity and lot, and tap Add.
- Step 2: Add a note and tap Send transfer.
Track franchise royalties
Outlets → Franchise → Add → Save agreement
- Step 1: Open Franchise and tap Add.
- Step 2: Enter the outlet, franchisee, royalty %, marketing fee % and any minimum guarantee. Tap Save agreement.
- Step 3: Open the Royalty statement and tap Print statement.
Choose who sees which outlet
Outlets → Access
- Step 1: Give each person All outlets or Selected outlets.
- Step 2: Group outlets by region or franchisee with New group.
Tips
- Analytics can combine every outlet you can see, with templates for consolidated P&L and GST.
- Each outlet can have its own GSTIN and invoice series.
Common problems
- I can't see Add outlet.
- It needs FoodPilot Cloud and permission to change settings and users. Check your plan's outlet limit in Billing & plan.
- It says the GSTIN must be 15 characters.
- A GSTIN has 15 characters and starts with the state code. Leave it blank to use the first outlet's.
- HQ says Only one outlet.
- Add a second outlet first.
Coming soon
- Open a new outlet from a template in a day (franchise launch kit)
- A daily health score for each outlet