
Sell 2 min read

Tables and floor plan

टेबल और फ़्लोर प्लान

See every table live, seat guests, move, merge or split tables, and draw your own floor plan.

हर टेबल का हाल एक नज़र में देखें, मेहमान बैठाएँ, टेबल बदलें, जोड़ें या बाँटें और अपना फ़्लोर प्लान बनाएँ।

Updated

Whole guide as PDF

What it does

See every table's status at a glance: Available, Occupied, Reserved, Cleaning or Billing.

Start an order with one tap, move or merge tables, and split items to another table.

Draw your own floor plan and give each waiter their own section.

Who uses it
CaptainCashierManagerOwner
Which plan
Growth and above
Where to find it
Sidebar → Tables (page title: Floor & tables)
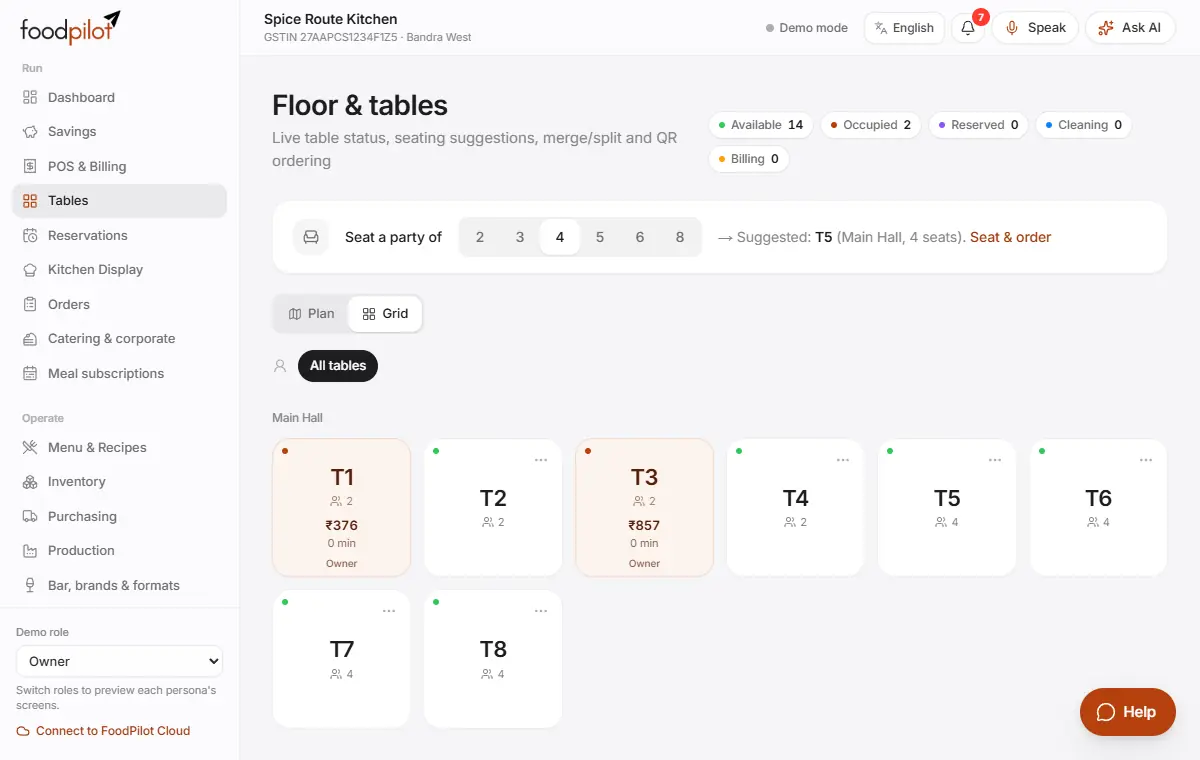
Floor & tables with table statuses, Seat a party of, and the Plan and Grid views

How to

Start an order on a table

Tables → tap a free table

  1. Step 1: Open Tables.
  2. Step 2: Tap a free table. The POS opens with that table ready.
  3. Step 3: For a busy table, tap it and choose Open order.

Options for a free table, such as Mark reserved, are behind ⋯ or a long-press.
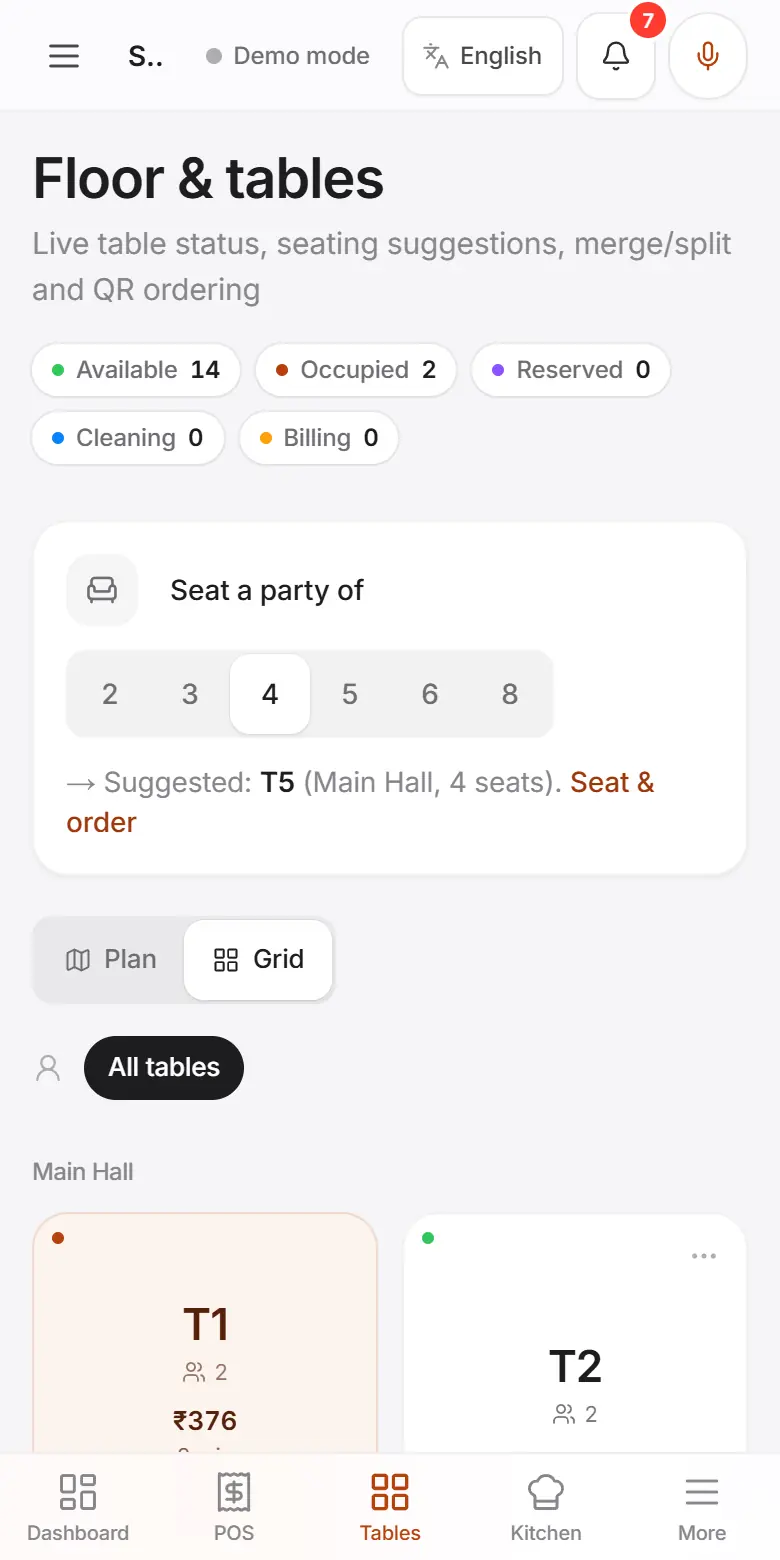
Tables on a phone with busy and free tables

Find a table for a group

  1. Step 1: Under Seat a party of, tap the group size.
  2. Step 2: FoodPilot suggests the best free table. Tap Seat & order.
  3. Step 3: If no table fits, add the group to the waitlist in Reservations, or merge two tables.

Move an order to another table

  1. Step 1: Tap the busy table, then Transfer.
  2. Step 2: Tap the free table to move to.
  3. Step 3: On the Plan view you can also hold a busy table, drop it on another, and choose Move order to ….

Merge two tables

  1. Step 1: Tap the table that keeps the order, then Merge.
  2. Step 2: Pick the other table. Its items move over and that table is freed.

Split items to another table

  1. Step 1: Tap the table, then Split. The order needs 2 or more items.
  2. Step 2: Tick the items to move, choose the table under Move to table, and tap Move items.

Draw your floor plan

Tables → Plan → Edit layout → Save

  1. Step 1: Tap Plan, then Edit layout.
  2. Step 2: Tap Add to place tables (pick a shape), walls or zones. Place all drops in every table at once.
  3. Step 3: Drag tables into place. Select one to set its name, seats, shape and rotation.
  4. Step 4: Tap Save.

Give waiters their own tables

Staff & payroll → Floor & sections

  1. Step 1: Go to Staff & payroll → Floor & sections.
  2. Step 2: Add sections, or tap Create from table areas, and assign a waiter to each.
  3. Step 3: Waiters tap My tables on the Tables page to see only theirs.

Tips

  • After guests leave, tap the table and choose Mark cleaning. Tap Mark available when it's ready.
  • Each table's sheet has Open guest QR menu. See Table QR: order and pay.
  • During a rush, use the waiter filter (All tables, My tables or a name).

Common problems

Split is greyed out.
The order needs at least 2 items. To move everything, use Transfer.
I can't see Edit layout.
Only people who can change settings, usually owners and managers, can edit the layout.
No free table fits the group.
Add them to the waitlist in Reservations, or merge two tables.

Coming soon

  • Print every table's QR code at once
  • Group ordering: each guest orders from their own phone
  • Pre-order before arriving

Read next

Help articles

The same articles the AI help chat uses. In the app: Help & support → Help articles.

Make a bill on the POSPOS पर बिल बनाएँRead

Take an order, send the KOT, collect payment and print or send the bill.

Make a bill

  1. Go to POS & Billing.
  2. Choose Dine-in, Takeaway or Delivery. For dine-in, pick the table.
  3. Tap dishes to add them, or use Search dish or code (press / on a keyboard). You can also type or speak the order with the mic.
  4. Tap KOT to send new items to the kitchen.
  5. Tap Pay, choose Cash, Card / UPI or another tender, and settle. You can take part cash and part UPI.
  6. Tap Print for the receipt, or Send e-bill to send the GST bill link by SMS or WhatsApp (Professional plan and above; on every plan you can show the bill QR or copy the link).

Common actions

  • Discount: apply a discount or coupon. Large discounts may need a manager PIN, depending on your approval rules.
  • Hold: park an order and come back to it.
  • Split: in the pay screen, split the bill Equal or By items.
  • Move items to another table, or merge tables, from the table actions.
  • Reprint KOT: reprints are logged in the audit trail.

Refunds and cancellations

  • Refunds are done from Orders → open the order → Refund. They need owner or manager approval and create a GST credit note.
  • Voiding an item asks for a reason, which is logged.

Service charge

  • Service charge is optional by law (CCPA guidelines). FoodPilot never adds it on its own, even if your edition suggests a rate.
  • On a dine-in bill, ask the guest. Only if they agree, tap Guest agreed to service charge. The bill then shows a separate Service charge (optional) line.
  • If the guest asks, tap Remove next to it (on the bill or in the pay screen) any time before the bill is settled.
  • Set the suggested rate, or 0 to hide the button, in Setup → Profile & GST → Suggested service charge %.

Cash of ₹2 lakh or more

  • Income-tax law doesn't allow cash of ₹2 lakh or more for one bill (split and part payments count together), for one catering event, or from one person in a day.
  • The pay screen stops cash at ₹1,99,999 for a bill and tells you to take the rest by UPI, card or bank transfer.
  • If a saved guest has already paid close to ₹2 lakh in cash today on other bills, you see a warning.

Good to know

  • Billing keeps working without internet. Bills sync when the connection returns, and each device has its own invoice series, so numbers never clash.
  • Invoice numbers look like SRK01/2627/00042: your invoice prefix (up to 3 characters), the device (01), the financial year (2026-27) and the bill number, which restarts every 1 April. GST allows at most 16 characters, and FoodPilot never goes over. Credit notes look like SRK01/2627/C0001.
  • The bill shows CGST + SGST or IGST based on the GST state set in Setup → Profile & GST.
Reservations and waitlistटेबल बुकिंग और वेटलिस्टRead

How to take table bookings, run the day's bookings and keep a walk-in waitlist.

Create a booking

  1. Go to Reservations → New booking.
  2. Enter the guest name, phone, party size, date and time, duration and source (Phone, Walk-in, Online or WhatsApp).
  3. Pick a table, or tap the table FoodPilot suggests. Add an occasion, a deposit amount and notes (allergies, seating preference, cake) if needed.
  4. FoodPilot shows the no-show risk. For a high risk, ask for a deposit or send a WhatsApp confirmation.
  5. Tap Save booking.

Run the day

  • Switch between List and Timeline, and change the date (Today jumps back).
  • On each booking, use Confirm, Seat, Open POS, Complete, No-show or Cancel.
  • Remind opens WhatsApp on this device with a ready reminder message for the guest; tap send in WhatsApp. Use Remind again for another reminder.
  • Bookings without a table show "No table", and late guests show "Late".

Waitlist

When the floor is full, tap Add walk-in in the Waitlist card. Enter name, phone and party size. FoodPilot quotes the wait from live tables, and you can override it. When a table frees up, tap Seat, choose the table, then Seat only or Seat & open POS. Tap Left if the guest leaves.

Good to know

  • Reminders are sent from WhatsApp on the device. Sending WhatsApp messages automatically needs a WhatsApp Business account to be connected.
  • The deposit field records the amount agreed; collect the money through your usual payment method.